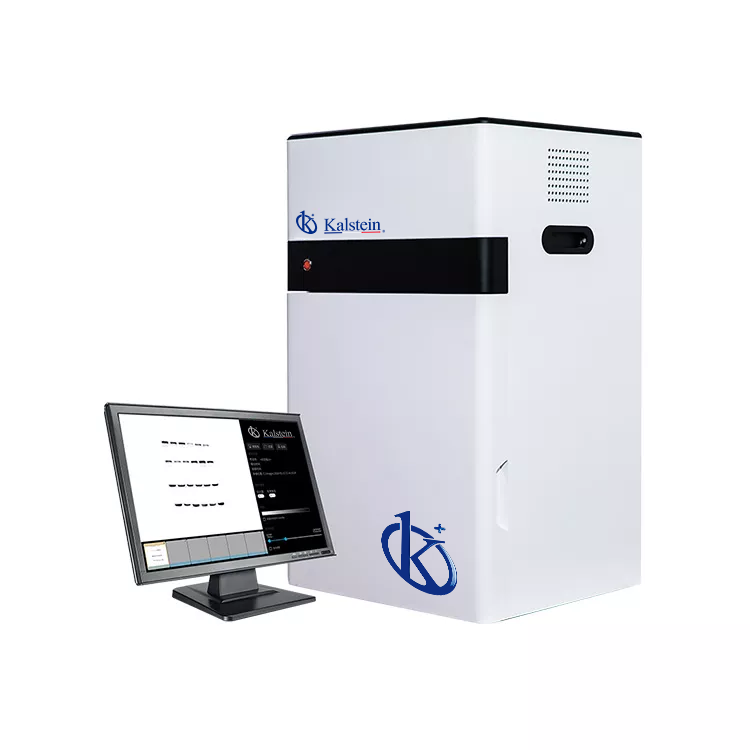
Installation and Commissioning Guide for the YR06212 Multifunctional Imager
The YR06212 Multifunctional Imager stands out in laboratories for its high performance and user-friendly design, facilitating fluorescence and chemiluminescence detection in visible light (RGB) and near-infrared (NIR). This guide aims to walk users through the installation and commissioning process, ensuring a smooth start to utilizing this sophisticated piece of laboratory equipment.
1. Unboxing Checklist
Before installation, it is crucial to verify that all components are present. The unboxing checklist for the YR06212 includes:
- YR06212 Multifunctional Imager Unit
- Power Cord
- User Manual
- Calibration Kit
- Software Installation CD
- Various Lens Options
- Sample Trays
- Optional External PC Connection Kit
2. Anchoring and Leveling the YR06212
Proper anchoring and leveling are essential for the optimal performance of the YR06212. Follow these steps:
- Place the imager on a stable, vibration-free surface.
- Use a spirit level to check the horizontal level of the unit.
- Adjust the feet of the imager if necessary to achieve a level position.
- Secure the unit to prevent accidental movements during operation.
3. Power-Up Sequence
To power up the YR06212 correctly, perform the following steps:
- Connect the power cord to the imager and plug it into a suitable power outlet.
- Press the power button located on the front panel.
- Wait for the system to initialize. The display will show a welcome message indicating the software version.
4. First-Run Calibration
Calibration is essential for ensuring accurate measurements. The first-run calibration process involves:
- Using the included calibration kit, select the appropriate filters and lenses for your application.
- Follow the on-screen prompts in the YR06212 software to complete the calibration process.
- Perform a test run using a standard sample and verify the readings against expected values.
5. Network and USB Setup
If you opt to use the optional external PC connection, follow these steps:
- Install the software on the external PC using the provided installation CD.
- Connect the external PC to the YR06212 using the USB cable provided.
- Ensure that both devices are powered on and communicate correctly.
6. Validation of First Measurement
To validate the first measurement:
- Insert a standard sample into the appropriate sample tray.
- Select the measurement mode required (e.g., fluorescence, chemiluminescence).
- Initiate the measurement and observe the results on the display.
- Record the data for future reference and analysis.
7. Common Setup Mistakes to Avoid
To ensure a seamless installation and commissioning, avoid these common mistakes:
- Not leveling the device properly, which can affect accuracy.
- Skipping the calibration step, leading to incorrect readings.
- Forgetting to secure the power connections, risking unintentional shutdowns.
- Not verifying software compatibility with the external PC before installation.
8. Technical Specifications of the YR06212
| Model | YR06212 |
|---|---|
| Application | Chemiluminescence Imaging, ECL Western Blotting |
| Sensor | Back illuminated SCMOS Sensor |
| Resolution | 9.0 Megapixels |
| Pixel Size | 3.76 × 3.76 μm |
| Temperature | -30 ℃ regulated |
| Dynamic Range | 4.8OD |
| Pixel Density | 16bit (65536 Grey scales) |
| Lens | F0.95 as standard (optional F0.8) Auto Focus |
| Sample Tray | Fixed 4 layers sample trays for different sizes of western blotting membranes |
| Software | SHST Capture and Analysis Software for unlimited number of users |
Frequently Asked Questions
What are the initial steps to install the YR06212 Multifunctional Imager?
The initial steps include unboxing the unit, checking all components, ensuring a stable surface for installation, leveling the device, and following the power-up sequence as detailed in the guide.
How do I perform the first-run calibration on the YR06212?
To perform the first-run calibration, use the calibration kit provided, follow the prompts in the YR06212 software, and verify the readings against a standard sample.
What should I do if the YR06212 does not power on?
If the device does not power on, check the power cord connections, ensure that the power outlet is functioning, and verify that the unit's power button is engaged.
Can I connect the YR06212 to an external PC?
Yes, you can connect the YR06212 to an external PC using the provided USB connection kit after installing the software on the PC.
What are some common mistakes during the installation of the YR06212?
Common mistakes include not leveling the device properly, skipping the calibration process, forgetting to secure the power connections, and not verifying software compatibility with the external PC.
How do I validate the first measurement taken by the YR06212?
To validate the first measurement, insert a standard sample into the tray, select the desired measurement mode, initiate the measurement, and record the data for analysis.
If you are looking for a fusion of innovation and quality, you have come to the right place. At Kalstein, we offer you the luxury of exploring our exclusive catalog of laboratory equipment. We manufacture every device to the highest standards of excellence. Our intuitive and seamless online purchasing channels are designed for your convenience, securing the most competitive prices. Hesitate no longer — we bring science to life, it is time to become part of our community.